I know people who are chili snobs. Yes, snobs. You know who you are. While simmering chili on the cook-top sounds amazingly delicious, I just don't have time for that.
This easy weeknight meal takes 30 minutes to make, start to finish, and is bursting with flavor. The best part about it is that I usually have all of the ingredients on hand. All I have to do is cook the meat, open some cans, simmer the ingredients, and I'm done!
Ingredients
1 lb lean ground beef, turkey, or chicken
1 medium onion, diced or 1 cup frozen diced onion (any kind, but I prefer white or yellow)
1 14.5 oz can diced tomatoes with green chiles
2 14.5 oz cans of beans (any kind, but kidney, pinto, black, and great northern beans work best)
1 8 oz can of tomato paste
3 cloves garlic, minced (about 1 tbsp)
1 packet of chili seasoning
1 tbsp chili powder
1 tbsp cumin
Directions
In a large pot, thoroughly brown and crumble the ground meat. Drain fat from meat by placing the cooked meat on a stack of paper towels. Return meat to pot.
Over medium-high heat, add the onion (frozen or fresh) and garlic and let it cook with the beef until translucent. Then, add chili seasoning, chili powder, cumin, tomato paste, and diced tomatoes. Stir well to combine. While the pot heats to a gentle simmer, drain and rinse your beans. Add those to the pot and stir to combine. Reduce the heat to medium, cover, and let simmer for 20 minutes.
For the batch of chili shown in the picture, I used frozen onion and switched things up a bit by using black beans and great northern beans. We like to serve this chili over brown rice, topped with a bit of cheddar cheese, and with a green salad on the side.
- Maggie White
Showing posts with label recipe. Show all posts
Friday, November 1, 2013
Monday, October 28, 2013
[ recipe ] :: slow cooker pork and black beans (freezer meal!)
I adapted this recipe from October's issue of Real Simple magazine. When I saw it, I was immediately drawn to its simplicity and how easily it could be prepared ahead of time and frozen. I've made it fresh and after being frozen, and it's great either way! This recipe makes 4 servings, of approximately 4 oz of pork per person.
Ingredients
1 pounds boneless pork roast (tenderloin, shoulder, or butt), trimmed of excess fat and cut into pieces
1 can of black beans, drained
1 cup orange juice (fresh or low sugar)
1 cup chicken broth (reduced fat, low sodium)
1 tbsp ground cumin
1 tbsp dried oregano
4 cloves garlic, minced (or 1 heaping tablespoon)
1/2 tsp salt
1 tsp black pepper
Toppings: salsa, green onion, diced onions, shredded lettuce or spinach (I used Swiss Chard), hot sauce, or avocado.
Directions
Put everything in your slow cooker, and stir gently to combine. Cook on LOW for 7-8 hours, or HIGH for 5-6 hours. Shred pork using two forks and give the pot a stir.
If you cut your pork into smaller 4 ounce pieces (I had 8 ounce pieces), you can reduce the cook time by 2 hours. Serve over brown rice or quinoa. This recipe would also be delicious inside of a taco!
Note: When I made this recipe after being frozen, the pork proteins broke down a bit and made a "foam" on top of the juices in the crock pot. This is normal and it is completely edible, but I scooped it off with a slotted spoon. I'm weird like that. It was still absolutely delicious.
To freeze it, I combined all of the ingredients except for the black beans. Sometimes beans will get mushy and lose their texture after being frozen. It is absolutely vital that you use proper food storage and thawing for this recipe.
Before cooking, thaw your frozen bag of food in the fridge for 1-2 days - putting frozen meat directly in the slow cooker can cause it to remain at unsafe temperatures for too long (between 40-140 degrees F) and can lead to food poisoning. Not fun! I cut the pork up into smaller pieces for freezing so they would thaw faster in the refrigerator, and if they didn't have time to thaw completely they would cook faster. As the meat thaws, it also marinates in the orange juice and spices, making it even more delicious!
I set up an assembly line of baggies. First, I labeled my baggies with the date, recipe, and directions. I cut up my meat and put approximately 1 pound in each bag. Then, I added my orange juice, broth, garlic, and spices. When I dumped the pork and juices in the slow cooker, I added my can of beans and cooked as usual.
Yum! I hope you enjoy this easy meal. The Hubs loved it by itself, without rice or toppings, and ate three servings of it for dinner the other night.
- Maggie White
Ingredients
1 pounds boneless pork roast (tenderloin, shoulder, or butt), trimmed of excess fat and cut into pieces
1 can of black beans, drained
1 cup orange juice (fresh or low sugar)
1 cup chicken broth (reduced fat, low sodium)
1 tbsp ground cumin
1 tbsp dried oregano
4 cloves garlic, minced (or 1 heaping tablespoon)
1/2 tsp salt
1 tsp black pepper
Toppings: salsa, green onion, diced onions, shredded lettuce or spinach (I used Swiss Chard), hot sauce, or avocado.
Directions
Put everything in your slow cooker, and stir gently to combine. Cook on LOW for 7-8 hours, or HIGH for 5-6 hours. Shred pork using two forks and give the pot a stir.
If you cut your pork into smaller 4 ounce pieces (I had 8 ounce pieces), you can reduce the cook time by 2 hours. Serve over brown rice or quinoa. This recipe would also be delicious inside of a taco!
Note: When I made this recipe after being frozen, the pork proteins broke down a bit and made a "foam" on top of the juices in the crock pot. This is normal and it is completely edible, but I scooped it off with a slotted spoon. I'm weird like that. It was still absolutely delicious.
To freeze it, I combined all of the ingredients except for the black beans. Sometimes beans will get mushy and lose their texture after being frozen. It is absolutely vital that you use proper food storage and thawing for this recipe.
Before cooking, thaw your frozen bag of food in the fridge for 1-2 days - putting frozen meat directly in the slow cooker can cause it to remain at unsafe temperatures for too long (between 40-140 degrees F) and can lead to food poisoning. Not fun! I cut the pork up into smaller pieces for freezing so they would thaw faster in the refrigerator, and if they didn't have time to thaw completely they would cook faster. As the meat thaws, it also marinates in the orange juice and spices, making it even more delicious!
I set up an assembly line of baggies. First, I labeled my baggies with the date, recipe, and directions. I cut up my meat and put approximately 1 pound in each bag. Then, I added my orange juice, broth, garlic, and spices. When I dumped the pork and juices in the slow cooker, I added my can of beans and cooked as usual.
Yum! I hope you enjoy this easy meal. The Hubs loved it by itself, without rice or toppings, and ate three servings of it for dinner the other night.
- Maggie White
Wednesday, October 16, 2013
[ recipe ] :: bake-on
Hah...get it? Baked bacon...bake-on.
I think I'm hilarious.
Anyway, this is the best way to make perfectly cooked bacon. It takes a bit longer than microwaving or frying, but it makes crisp, flavorful, low-grease bacon every time.
Ingredients
Bacon. Lots of bacon.
Directions
Preheat oven to 400 degrees. Line a cookie sheet with parchment paper and arrange the bacon into a single layer. Cook for 20-30 minutes, being careful to check the bacon periodically after 30 minutes. Alter cooking time if you like your bacon more or less crispy.
We like our bacon almost burned (super-crisp), and it takes about 40 minutes. It seems like a long time, but in the morning we can pop the bacon in the oven while we make coffee, slice fruit, and cook eggs. The clean-up is easy, too! Just toss the parchment paper and rinse your pan. Alternatively, you can use aluminum foil if you don't have parchment paper, but I think the paper does a better job of absorbing grease. Blot gently with a paper towel to remove excess fat.
- Maggie White
Tuesday, October 8, 2013
[ recipe ] :: one-pot easy-peasy chicken pasta
I have absolutely no clue what to name this dish, but "Easy-Peasy Chicken Pasta" sounds good, right? I adapted this recipe from this original source (her pictures are much prettier), added more veggies, and lightened it up a bit.
This recipe has layer upon layer of flavor, getting a rich flavor from the chicken broth and a creamy tang from the Greek yogurt. My absolute favorite part of this recipe (aside from eating it hot out of the pot) is when it's leftover. It turns into a sort of tetrazini-like dish. To get this dish to do double-duty, place leftovers in a casserole dish or ramekin and refrigerate. Top with cheese and breadcrumbs, and bake until re-heated! If you're lucky, your family won't notice that you've re-purposed a meal two nights in a row.
Ingredients
1 12 oz package of spaghetti
1 lb boneless, skinless chicken breasts cut into 1" cubes
10 oz frozen peas
8 oz sliced mushrooms
32 oz fat-free, low sodium chicken broth
1 tbsp minced garlic
Fresh thyme, or 1 tbsp dried thyme (I used lemon thyme from my garden)
1 tbsp lemon juice
1 cup low-fat Greek yogurt
Grated parmesan cheese
Salt and pepper, to taste
Directions
Break spaghetti noodles in half and place them in the pot with the chicken cubes, peas, and mushrooms. Cover with chicken broth, add lemon juice and thyme. Cook uncovered over medium-high heat until the broth begins to boil. Stir frequently and boil for 10 minutes, or until the pasta is cooked and some of the broth has evaporated. When approximately half of the broth has cooked off, remove the pot from the heat and stir in the Greek yogurt. Sprinkle with parmesan cheese and serve immediately.
Note: If you like your peas well-cooked, add them at the beginning of cooking. If you like your peas less cooked (as I do), add them after 7-10 minutes. We love garlic, so you may notice that in the picture above I threw two heaping tablespoons in the pot. If you don't share the same love for it as we do, then try 1 tablespoon (as written in the recipe) or even less. It won't change the taste too dramatically!
Enjoy!
- Maggie White
This recipe has layer upon layer of flavor, getting a rich flavor from the chicken broth and a creamy tang from the Greek yogurt. My absolute favorite part of this recipe (aside from eating it hot out of the pot) is when it's leftover. It turns into a sort of tetrazini-like dish. To get this dish to do double-duty, place leftovers in a casserole dish or ramekin and refrigerate. Top with cheese and breadcrumbs, and bake until re-heated! If you're lucky, your family won't notice that you've re-purposed a meal two nights in a row.
1 12 oz package of spaghetti
1 lb boneless, skinless chicken breasts cut into 1" cubes
10 oz frozen peas
8 oz sliced mushrooms
32 oz fat-free, low sodium chicken broth
1 tbsp minced garlic
Fresh thyme, or 1 tbsp dried thyme (I used lemon thyme from my garden)
1 tbsp lemon juice
1 cup low-fat Greek yogurt
Grated parmesan cheese
Salt and pepper, to taste
Directions
Break spaghetti noodles in half and place them in the pot with the chicken cubes, peas, and mushrooms. Cover with chicken broth, add lemon juice and thyme. Cook uncovered over medium-high heat until the broth begins to boil. Stir frequently and boil for 10 minutes, or until the pasta is cooked and some of the broth has evaporated. When approximately half of the broth has cooked off, remove the pot from the heat and stir in the Greek yogurt. Sprinkle with parmesan cheese and serve immediately.
Note: If you like your peas well-cooked, add them at the beginning of cooking. If you like your peas less cooked (as I do), add them after 7-10 minutes. We love garlic, so you may notice that in the picture above I threw two heaping tablespoons in the pot. If you don't share the same love for it as we do, then try 1 tablespoon (as written in the recipe) or even less. It won't change the taste too dramatically!
Enjoy!
- Maggie White
Tuesday, September 24, 2013
[ recipe ] :: stupid easy ground beef
Again, does this even count as a recipe?
A few years ago, I was looking for a way to add more veggies to our diet and to stretch our budget by using less meat in my recipes. The first place I started was with the ground beef I use for our "Mexican night" meals. By adding diced, canned tomatoes to seasoned ground beef, I'm able to use about half of the meat I normally would and add twice the flavor. I quickly found that this method makes ground turkey taste more like the "real deal" and keeps it from drying out.
I make a big batch a the beginning of the week, and use the beef for tacos, enchiladas, salads, and even chili. This week, I used 2 pounds of lean ground beef and made tacos and spicy beef chili. All in all, one batch gave us 6 meals for the two of us (3 dinners and 3 lunches each).
Ingredients
1 lb ground beef or turkey (80% to 97% lean works best)
1 14.5 oz can of diced tomatoes, drained (plain, seasoned, or with green chiles)
1 taco seasoning packet
Directions
Cook ground meat thoroughly and chop into crumbles. Drain thoroughly by placing cooked meat on a thick stack of paper towels. Pat with more paper towels to remove grease. Return the meat to a pan and add tomatoes and seasoning. Stir well and simmer for 2-3 minutes, or until the excess tomato juice cooks away.
Serve inside tacos, burritos, enchiladas, or on top of a taco salad! Leftovers are delicious added to chili.
- Maggie White
A few years ago, I was looking for a way to add more veggies to our diet and to stretch our budget by using less meat in my recipes. The first place I started was with the ground beef I use for our "Mexican night" meals. By adding diced, canned tomatoes to seasoned ground beef, I'm able to use about half of the meat I normally would and add twice the flavor. I quickly found that this method makes ground turkey taste more like the "real deal" and keeps it from drying out.
I make a big batch a the beginning of the week, and use the beef for tacos, enchiladas, salads, and even chili. This week, I used 2 pounds of lean ground beef and made tacos and spicy beef chili. All in all, one batch gave us 6 meals for the two of us (3 dinners and 3 lunches each).
Ingredients
1 lb ground beef or turkey (80% to 97% lean works best)
1 14.5 oz can of diced tomatoes, drained (plain, seasoned, or with green chiles)
1 taco seasoning packet
Directions
Cook ground meat thoroughly and chop into crumbles. Drain thoroughly by placing cooked meat on a thick stack of paper towels. Pat with more paper towels to remove grease. Return the meat to a pan and add tomatoes and seasoning. Stir well and simmer for 2-3 minutes, or until the excess tomato juice cooks away.
Serve inside tacos, burritos, enchiladas, or on top of a taco salad! Leftovers are delicious added to chili.
- Maggie White
Monday, September 23, 2013
[ recipe ] :: stupid easy watermelon and feta salad
It's a little past watermelon's peak-season, but here in Georgia you can find it on sale until mid to late September. This recipe was inspired by a dish my mom made on Labor Day weekend (I think she got it from Southern Living magazine), but I simplified it a lot. If you haven't noticed yet, I like recipes that have just a few flavorful ingredients and are easy to make.
So easy, in fact, that you say, "gah! I am so stupid for not thinking of that first." Hence, this recipe is stupid easy.
I love the combination of sweet, juicy watermelon, pungent feta, tangy balsamic vinegar, and crisp, peppery arugula. We have served this at a dinner party before and our guests were a little shocked by having watermelon in such a savory salad, but after a few bites they changed their minds! Everyone will be gobbling this dish up.
Ingredients
2 cups fresh watermelon, cubed into 1-2" pieces
4 oz feta cheese
4 cups lettuce - romaine, mesclun greens, arugula, or a mix (my favorite is arugula!)
1/4 cup balsamic glace (I used Colavita)
A healthy drizzle of olive oil
Fresh ground black pepper, to taste
Directions
In a large bowl, layer lettuce, watermelon, and feta cheese. Drizzle on olive oil and balsamic glace, and dust with ground black pepper. Toss just before serving.
I lightened-up this recipe by changing the dressing to a pre-bottled balsamic glace and olive oil. Don't skimp on the oil, though! Watermelon contains a ton of lycopene and vitamins, both of which need a healthy fat in order to be absorbed during digestion.
This salad is delicious with grilled seafood, steak, or burgers, and makes a great light (but filling!) meal. Fair warning - this salad does not keep well, so eat it all at once! It shouldn't be too difficult.
Enjoy!
- Maggie White
So easy, in fact, that you say, "gah! I am so stupid for not thinking of that first." Hence, this recipe is stupid easy.
I love the combination of sweet, juicy watermelon, pungent feta, tangy balsamic vinegar, and crisp, peppery arugula. We have served this at a dinner party before and our guests were a little shocked by having watermelon in such a savory salad, but after a few bites they changed their minds! Everyone will be gobbling this dish up.
Ingredients
2 cups fresh watermelon, cubed into 1-2" pieces
4 oz feta cheese
4 cups lettuce - romaine, mesclun greens, arugula, or a mix (my favorite is arugula!)
1/4 cup balsamic glace (I used Colavita)
A healthy drizzle of olive oil
Fresh ground black pepper, to taste
Directions
In a large bowl, layer lettuce, watermelon, and feta cheese. Drizzle on olive oil and balsamic glace, and dust with ground black pepper. Toss just before serving.
I lightened-up this recipe by changing the dressing to a pre-bottled balsamic glace and olive oil. Don't skimp on the oil, though! Watermelon contains a ton of lycopene and vitamins, both of which need a healthy fat in order to be absorbed during digestion.
This salad is delicious with grilled seafood, steak, or burgers, and makes a great light (but filling!) meal. Fair warning - this salad does not keep well, so eat it all at once! It shouldn't be too difficult.
Enjoy!
- Maggie White
Monday, September 16, 2013
[ recipe ] :: stupid easy hard-boiled eggs
Hard-boiled eggs: does this even count as a recipe?
The Hubs and I love to have hard-boiled eggs on hand for breakfast or a quick snack. They are especially cost effective as well! One dozen eggs (from Aldi) costs us $1.39, or about $0.12 per egg. Talk about a cheap breakfast.
I believe that there is an art to cooking the perfect hard-boiled egg. If undercooked, the yolk is soft and runny, but overcooked the yolk gets a gray "ring" around it. It's still edible, but not particularly appetizing! Here's my method for making the best hard-boiled egg ever.
This is what you do:
1) Fill a large pot with cold water, and gently place your eggs inside.
2) Add 1 tbsp white vinegar (this keeps the egg whites from running everywhere if one of the eggs breaks).
3) Turn up the heat! Heat on high until your water begins to boil. This will take 10-15 minutes, depending on your burner and pot size.
4) Boil 1 minute-ish. I usually forget to check on the pot, so it's never exact!
5) Turn off, and let cool. It doesn't need to be at room temperature, just cool enough to handle.
6) Let your eggs cool to room temperature and refrigerate.
Hard-boiled eggs last about one week in the fridge in the shell, or 2 days out of the shell.
Enjoy them plain, or in egg salad or in tuna salad. They're also delicious on top of mixed greens!
- Maggie White
The Hubs and I love to have hard-boiled eggs on hand for breakfast or a quick snack. They are especially cost effective as well! One dozen eggs (from Aldi) costs us $1.39, or about $0.12 per egg. Talk about a cheap breakfast.
I believe that there is an art to cooking the perfect hard-boiled egg. If undercooked, the yolk is soft and runny, but overcooked the yolk gets a gray "ring" around it. It's still edible, but not particularly appetizing! Here's my method for making the best hard-boiled egg ever.
This is what you do:
1) Fill a large pot with cold water, and gently place your eggs inside.
2) Add 1 tbsp white vinegar (this keeps the egg whites from running everywhere if one of the eggs breaks).
3) Turn up the heat! Heat on high until your water begins to boil. This will take 10-15 minutes, depending on your burner and pot size.
4) Boil 1 minute-ish. I usually forget to check on the pot, so it's never exact!
5) Turn off, and let cool. It doesn't need to be at room temperature, just cool enough to handle.
6) Let your eggs cool to room temperature and refrigerate.
Hard-boiled eggs last about one week in the fridge in the shell, or 2 days out of the shell.
Enjoy them plain, or in egg salad or in tuna salad. They're also delicious on top of mixed greens!
- Maggie White
Wednesday, September 11, 2013
[ recipe ] :: salsa verde chicken
This is one of the easiest slow cooker meals I know, and one of The Hubs' favorite dinners. It's also super duper cheap to make, since I usually have all of the ingredients on hand. I tried to take more pictures once the recipe was finished but we may have eaten it all before I got a chance. Oops...
We really couldn't resist eating it. It's a light, healthy meal but full of flavor from the salsa and spices. It's perfect plain, or as tacos, enchiladas, or over a salad. I'm partial to topping rice bowls with leftover Salsa Verde Chicken at home, filled with black beans, shredded lettuce, olives, a bit of cheese, and more salsa.
This recipe made three meals for two very hungry adults - one big dinner and two smaller lunches each. The Hubs is so excited to get to eat this for three days!
Ingredients
3 lbs boneless, skinless chicken breasts
1 16-ounce jar of Salsa Verde (I like Aldi's Benita brand)
1 tbs minced garlic, about 3 cloves
1 tbs dried oregano
2 tsp cumin
1 tsp ground black pepper
1 tsp salt
Directions
Trim all visible fat from chicken breasts, and slice them into 3-4" chunks. Place chicken breasts in a slow cooker and cover with the salsa verde. Add other ingredients and stir to mix before covering tightly. Cook on LOW for 4 hours, or HIGH for 2 hours.
After cooking, shred the chicken breasts with two forks and stir to mix with the salsa mixture. Makes 8 6-ounce servings.
Serve as tacos, tostadas, or even over a bed of brown rice. Tonight, we topped our shredded Salsa Verde Chicken with sharp cheddar cheese and homemade pickled onions and had a watermelon salad on the side.
Get your chicken ($1.99/lb) and salsa verde ($1.69) on sale, and you're lookin' at about $1.30 per serving of this yummy chicken!
- Maggie White
We really couldn't resist eating it. It's a light, healthy meal but full of flavor from the salsa and spices. It's perfect plain, or as tacos, enchiladas, or over a salad. I'm partial to topping rice bowls with leftover Salsa Verde Chicken at home, filled with black beans, shredded lettuce, olives, a bit of cheese, and more salsa.
This recipe made three meals for two very hungry adults - one big dinner and two smaller lunches each. The Hubs is so excited to get to eat this for three days!
| I'm working on a new picture - promise! The Hubs says this does not accurately represent what it looks like. |
Ingredients
3 lbs boneless, skinless chicken breasts
1 16-ounce jar of Salsa Verde (I like Aldi's Benita brand)
1 tbs minced garlic, about 3 cloves
1 tbs dried oregano
2 tsp cumin
1 tsp ground black pepper
1 tsp salt
Directions
Trim all visible fat from chicken breasts, and slice them into 3-4" chunks. Place chicken breasts in a slow cooker and cover with the salsa verde. Add other ingredients and stir to mix before covering tightly. Cook on LOW for 4 hours, or HIGH for 2 hours.
After cooking, shred the chicken breasts with two forks and stir to mix with the salsa mixture. Makes 8 6-ounce servings.
Serve as tacos, tostadas, or even over a bed of brown rice. Tonight, we topped our shredded Salsa Verde Chicken with sharp cheddar cheese and homemade pickled onions and had a watermelon salad on the side.
Get your chicken ($1.99/lb) and salsa verde ($1.69) on sale, and you're lookin' at about $1.30 per serving of this yummy chicken!
- Maggie White
Friday, September 6, 2013
[ recipe ] :: black bean, corn, and avocado summer salad
This is not your normal summer salad. This is a savory, stick-to-your-ribs kind of salad. The olive oil, salt, and cumin work together with the avocado to make this dish a little creamy and decadent, but still healthy due to the healthy fats from the avocado and olive oil. At first it is a bit acidic, but it mellows out the longer it sits. Serve over a bed of lettuce as a main dish, or as a side with spicy grilled chicken or tacos. I even like it as a dip, and I'm guilty for eating an insane amount of this stuff with tortilla chips. Make it when the ingredients are fresh and in season to enhance flavor and your budget!
Salad:
4 ears sweet corn, raw (about 2 - 3 cups)
1 14 oz can black beans, drained and rinsed
1 cup fresh tomatoes, diced
1 medium onion, diced (red onion or Vidalia onion)
2 avocados, diced
1 cup peppers, diced (I used a mix of bell, banana, and jalapeno peppers)
Dressing:
1 tbsp olive oil
1/3 cup lime juice, or more to taste
1 heaping tbsp cumin
1/2 tbsp ground black pepper, or to taste (I use 1 tbsp)
1/2 tbsp salt, or to taste (I use 1 tbsp)
Garnish: (optional)
cilantro, chopped
green onion tops, sliced
Substitutions: You can substitute roasted red peppers (packed in water) or canned tomatoes for the fresh tomatoes. Canned corn may also be used in place of fresh sweet corn.
Instructions:
Shuck and wash corn. Carefully cut off kernels with a knife, and place in a large mixing bowl. Next, dump in your rinsed black beans, tomatoes, onion, avocados, and peppers. In another small bowl, mix lime juice, oil, cumin, salt, and pepper; whisk to mix. Pour dressing over the salad and toss well. (Your avocaodo and beans may get mashed, but it makes it better!) Garnish with fresh cilantro and green onion.
Let marinate in the fridge for best flavor before serving. In my experience, this keeps well for 2-3 days. If it lasts that long.
Makes 10 one-cup servings as a main dish. Makes 20+ half-cup servings as a side dish. (Ok, the serving sizes are totally a lie, because everyone will gobble this stuff up).
When I make a big batch, the Hubs and I will have some for dinner, and then with our lunches and snacks for a few days afterward.
Enjoy!
- Maggie White
Salad:
4 ears sweet corn, raw (about 2 - 3 cups)
1 14 oz can black beans, drained and rinsed
1 cup fresh tomatoes, diced
1 medium onion, diced (red onion or Vidalia onion)
2 avocados, diced
1 cup peppers, diced (I used a mix of bell, banana, and jalapeno peppers)
Dressing:
1 tbsp olive oil
1/3 cup lime juice, or more to taste
1 heaping tbsp cumin
1/2 tbsp ground black pepper, or to taste (I use 1 tbsp)
1/2 tbsp salt, or to taste (I use 1 tbsp)
Garnish: (optional)
cilantro, chopped
green onion tops, sliced
Substitutions: You can substitute roasted red peppers (packed in water) or canned tomatoes for the fresh tomatoes. Canned corn may also be used in place of fresh sweet corn.
Instructions:
Shuck and wash corn. Carefully cut off kernels with a knife, and place in a large mixing bowl. Next, dump in your rinsed black beans, tomatoes, onion, avocados, and peppers. In another small bowl, mix lime juice, oil, cumin, salt, and pepper; whisk to mix. Pour dressing over the salad and toss well. (Your avocaodo and beans may get mashed, but it makes it better!) Garnish with fresh cilantro and green onion.
Let marinate in the fridge for best flavor before serving. In my experience, this keeps well for 2-3 days. If it lasts that long.
Makes 10 one-cup servings as a main dish. Makes 20+ half-cup servings as a side dish. (Ok, the serving sizes are totally a lie, because everyone will gobble this stuff up).
When I make a big batch, the Hubs and I will have some for dinner, and then with our lunches and snacks for a few days afterward.
Enjoy!
- Maggie White
Tuesday, August 27, 2013
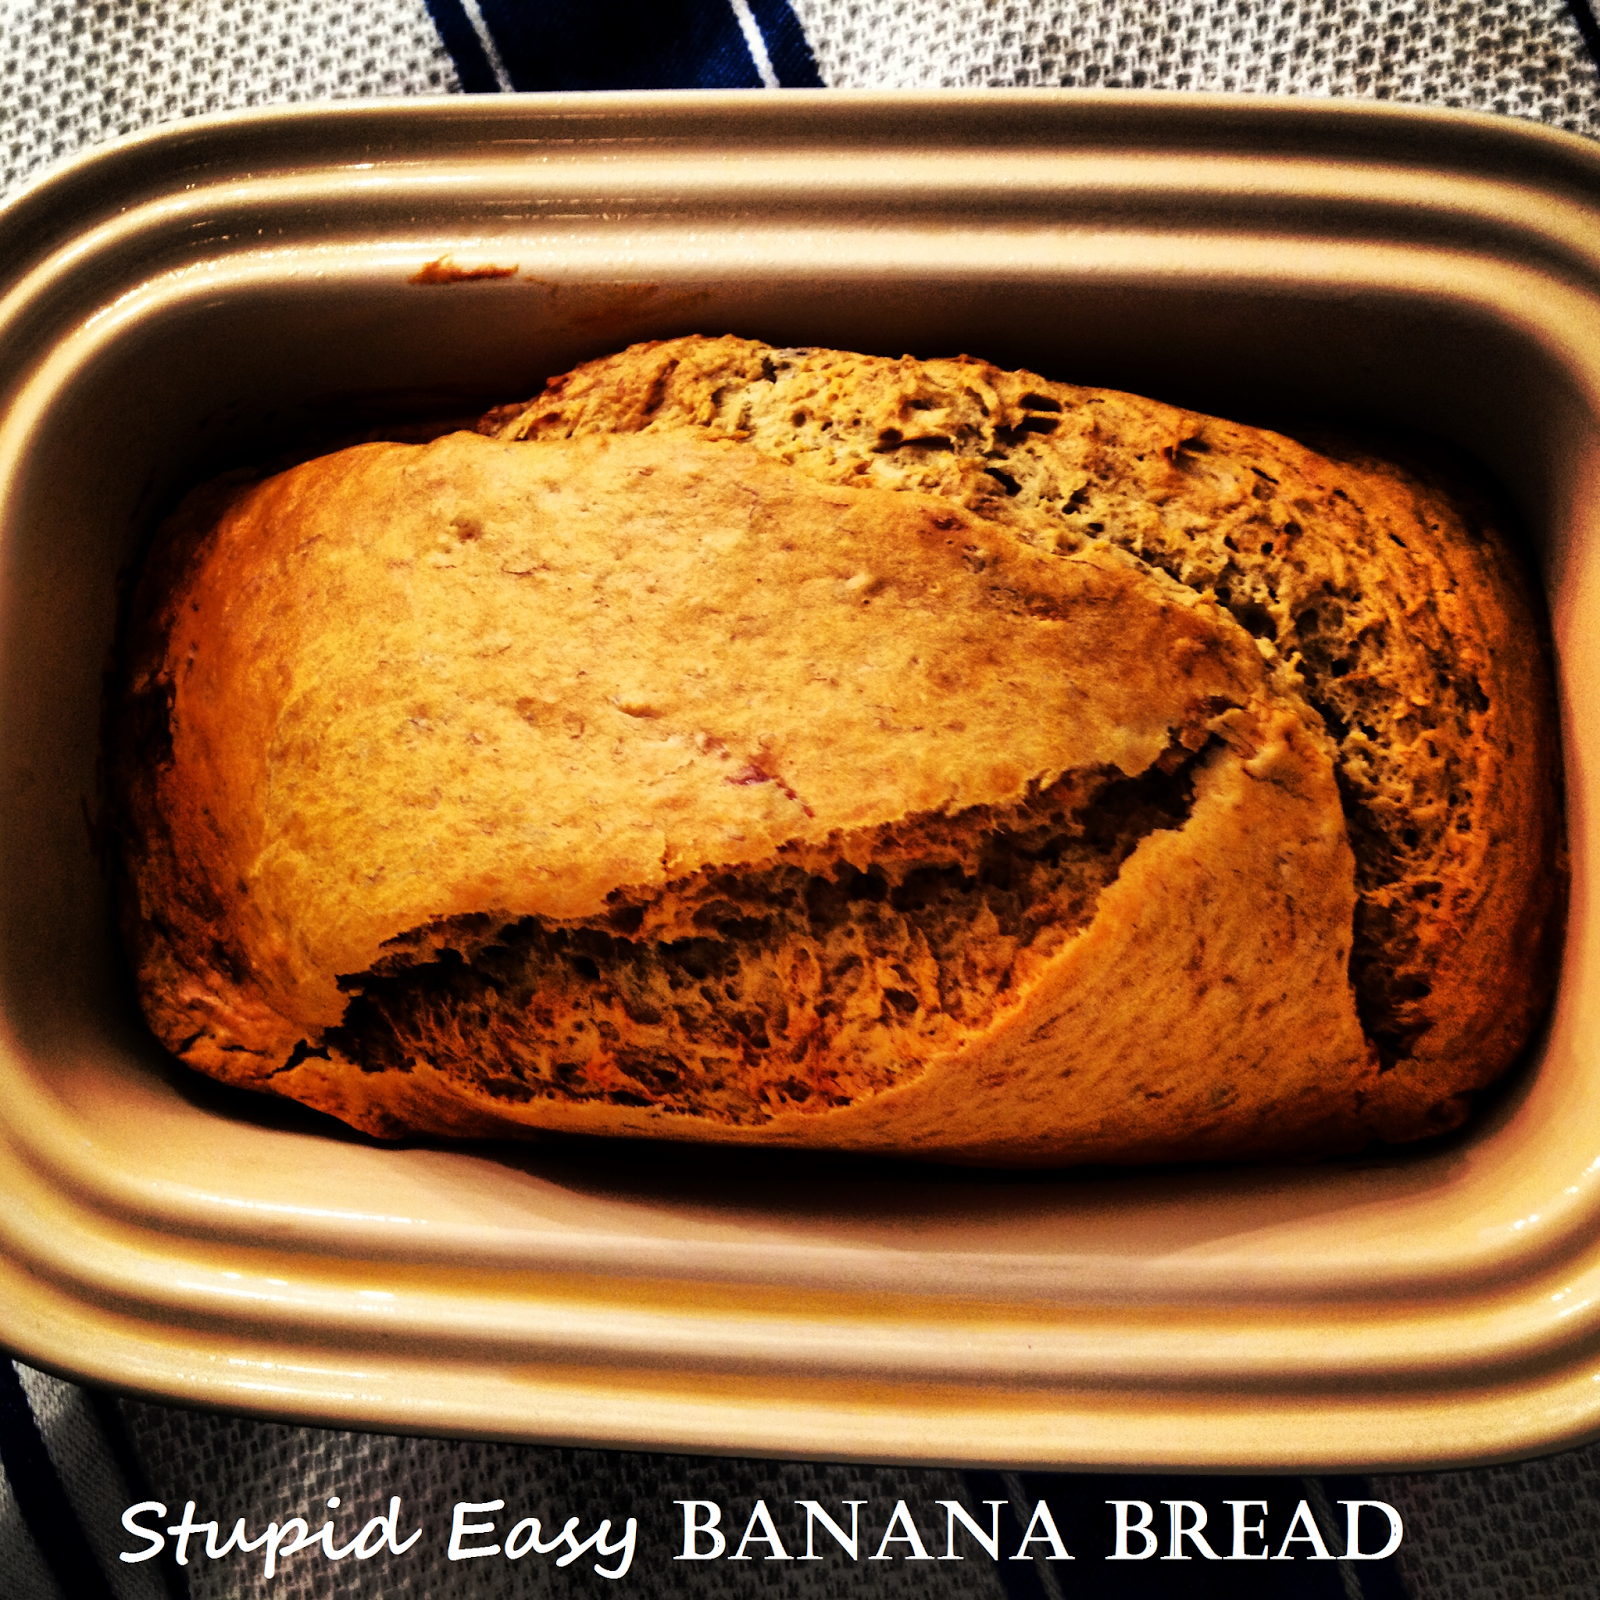
[ recipe ] :: stupid easy banana bread
Confession: I cannot bake.
However, I've started to bake muffins or bread every Sunday to eat for breakfast throughout the week. Not only is this more economical than buying breads or bagels, it is much healthier since you can pick and choose the ingredients yourself. (Read: no artificial crap.) I've had great success with blueberry muffins and decided to try making banana bread.
Bananas were on sale for $0.44/lb two weeks ago, so I bought 10 pounds.
Yes. 10 pounds of bananas. The Hubs thinks he is a monkey. This is pretty much what happens when I bring bananas into the house:
We ate one bunch (about 2 lbs) throughout the week as snacks, and I chopped froze the rest to use in smoothies. However, one lonely bunch of bananas was left on the counter. After about a week, they had gotten mushy and spotted.
Now, the old Maggie White (in her wasteful post-college days) would have tossed them. But no. I now see disgusting, smooshy bananas and think: banana bread! My mom used to bake banana bread, and the one trick I picked up on was this: The more mushy and spotted your 'nanas are, the sweeter and more lovely they get for baking.
I scoured the internet for recipes, but almost all of the banana bread recipes had fancy-schmancy ingredients...like honey or vanilla extract or raisins. Raisins?! No. I wanted a simple recipe that didn't take away from the delicious flavor of bananas. Now, I do recommend adding chopped nuts (walnuts especially) to your bread because it tastes awesome, but I am poor and a bag of walnuts costs $5.99. Alright, I'm not too broke to spend $6 on chopped nuts but my inner-miser won't let me.
So here's my modified version of banana bread. It's so simple, it's stupid easy to make!
Ingredients:
4 bananas, very ripe and well mashed
1 cup sugar (or Splenda)
2 eggs, beaten
1/3 cup vegetable oil (or 1/2 cup unsweetened apple sauce)
2 cups flour (1 cup can be whole wheat)
1 tsp baking soda
1/2 tsp salt
Directions:
Mash bananas in a large mixing bowl, then add sugar (or Splenda), eggs, and oil, mixing well each time. Add flour, baking soda, and salt to banana mixture. Pour in a lightly greased 5x9 loaf pan. Bake 60-70 minutes at 350 degrees, or until a fork inserted into the center of the bread comes out clean.
You may want to adjust your sugar level, since the more ripened bananas get much sweeter. For extra crunch and flavor, try adding 1/2 cup chopped walnuts or pecans to the mix. Semisweet chocolate chips are also an amazing addition!
Try not to eat it all at once. If you're feeling really naughty, top hot slices with honey or blueberry preserves. Delish! The best thing is, this bread freezes well and lasts up to a week in the fridge.
What's your favorite non-traditional bread? I think I'll try zucchini bread next time, seeing as how I have 5 pounds of grated zukes in my freezer!
- Maggie White
However, I've started to bake muffins or bread every Sunday to eat for breakfast throughout the week. Not only is this more economical than buying breads or bagels, it is much healthier since you can pick and choose the ingredients yourself. (Read: no artificial crap.) I've had great success with blueberry muffins and decided to try making banana bread.
Bananas were on sale for $0.44/lb two weeks ago, so I bought 10 pounds.
Yes. 10 pounds of bananas. The Hubs thinks he is a monkey. This is pretty much what happens when I bring bananas into the house:
We ate one bunch (about 2 lbs) throughout the week as snacks, and I chopped froze the rest to use in smoothies. However, one lonely bunch of bananas was left on the counter. After about a week, they had gotten mushy and spotted.
Now, the old Maggie White (in her wasteful post-college days) would have tossed them. But no. I now see disgusting, smooshy bananas and think: banana bread! My mom used to bake banana bread, and the one trick I picked up on was this: The more mushy and spotted your 'nanas are, the sweeter and more lovely they get for baking.
| Gross! But yummy. All at the same time. |
I scoured the internet for recipes, but almost all of the banana bread recipes had fancy-schmancy ingredients...like honey or vanilla extract or raisins. Raisins?! No. I wanted a simple recipe that didn't take away from the delicious flavor of bananas. Now, I do recommend adding chopped nuts (walnuts especially) to your bread because it tastes awesome, but I am poor and a bag of walnuts costs $5.99. Alright, I'm not too broke to spend $6 on chopped nuts but my inner-miser won't let me.
So here's my modified version of banana bread. It's so simple, it's stupid easy to make!
Ingredients:
4 bananas, very ripe and well mashed
1 cup sugar (or Splenda)
2 eggs, beaten
1/3 cup vegetable oil (or 1/2 cup unsweetened apple sauce)
2 cups flour (1 cup can be whole wheat)
1 tsp baking soda
1/2 tsp salt
Directions:
Mash bananas in a large mixing bowl, then add sugar (or Splenda), eggs, and oil, mixing well each time. Add flour, baking soda, and salt to banana mixture. Pour in a lightly greased 5x9 loaf pan. Bake 60-70 minutes at 350 degrees, or until a fork inserted into the center of the bread comes out clean.
You may want to adjust your sugar level, since the more ripened bananas get much sweeter. For extra crunch and flavor, try adding 1/2 cup chopped walnuts or pecans to the mix. Semisweet chocolate chips are also an amazing addition!
Try not to eat it all at once. If you're feeling really naughty, top hot slices with honey or blueberry preserves. Delish! The best thing is, this bread freezes well and lasts up to a week in the fridge.
What's your favorite non-traditional bread? I think I'll try zucchini bread next time, seeing as how I have 5 pounds of grated zukes in my freezer!
- Maggie White
Monday, August 26, 2013
[ recipe ] :: stupid easy popcorn
Ok, so
this isn't really a recipe, but it's one of my favorite snacks. I had
to share it! Popcorn gets a bad rep from it's movie-theater
counterparts: one small bag of popcorn at the movies can be anywhere
from 350-650 calories, and loaded with fat! Plus, the artificial
flavors, oils, and preservatives can make you feel icky and bloated
afterwards. Can we pause to mention that this recipe is a money saver, too? I got a 30 ounce jar of kernels on sale at the store for $1.49 - this stuff lasts forever since you only use a few tablespoons per serving! I don't even keep track of the price of single serve bags, but I do know that the price of movie theater popcorn is astronomical!
Popcorn,
by itself, is actually quite a healthy food. If you are going to nosh
on a crunchy snack, ditch the chips and go for the corn! Popcorn is a
whole grain (yep! - 100% unprocessed whole grains) and has lots of good
dietary fiber. This means it will fill you up, help regulate your
insulin and blood sugar levels, and help "move things along" in the
bathroom. I ran across a story on popcorn
a while back that pointed out that popcorn husks (those annoying shells
that get stuck in your teeth) had relatively high levels of polyphenols - antioxidants that help prevent cell damage and have disease-fighting properties.
Here are the stats* on 3 cups of air-popped popcorn:
Calories:120
Fat: 1g (all healthy monounsaturated and polyunsaturated fats)
Cholesterol: 0g
Carbohydrates: 18.7g (6% of the recommended value) and 3.5g fiber
Protein: 3.1g
* data compiled from multiple sites.
I've
always loved popcorn, and used to opt for those pre-flavored
100-calorie microwave bags from the grocery store. I don't know about
you, but those did not work for me. Not enough popcorn! Thus
ensued my quest to make the perfect corn. I tried making it on the
stove, in a pot, in a pan...but the perfect popcorn comes from the
microwave in a plain, brown paper bag.
My
husband *loves* this snack, as long as I'm not trying to sneak it into
the theater in one-gallon Ziploc bags. It's really versatile (you can
season it however you like), low in calories, and high in fiber!
It's so simple, I don't even need words to explain...but just in case...
Step 1: Pick out your kernels (plain and unprocessed!) and flavoring.
Step 2: Cover the bottom of the bag with a layer of popcorn seeds. Not all of them will pop, so add a little extra.
Step 1: Pick out your kernels (plain and unprocessed!) and flavoring.
Step 2: Cover the bottom of the bag with a layer of popcorn seeds. Not all of them will pop, so add a little extra.
Step 3: Fold the top of the bag over twice. Pop in the microwave for 2 minutes.
Step 4: Add your flavors, close bag, and shake! Some of the seasoning may fall to the bottom while you eat, so keep shaking as you go.
You
can add almost any seasoning to popcorn, but skip the butter and oil
for a healthier option. Experiment with different herbs and spices and
find what you like! Here are some of my favorite seasonings for
popcorn:
- My go-to: Cinnamon & Salt
- Parmesean Chese, Garlic Salt, and Oregano (if I'm feeling naughty)
- Hot Sauce!
- Parmesean Chese, Garlic Salt, and Oregano (if I'm feeling naughty)
- Hot Sauce!
- Chile powder - my husband's favorite
- Indian spiced: Cumin, Paprika, and Garam Masala
If you like your seasonings to stick a bit better, you can roll the kernels in 1-2 tsp of canola oil mixed with your seasonings before microwaving. Careful though! The oil will soak into the bag and be quite hot.
- Indian spiced: Cumin, Paprika, and Garam Masala
If you like your seasonings to stick a bit better, you can roll the kernels in 1-2 tsp of canola oil mixed with your seasonings before microwaving. Careful though! The oil will soak into the bag and be quite hot.
Next time you're ready to grab some chips, think about switching them out for a healthier, whole-grain option. :)
Subscribe to:
Posts (Atom)