Being fabulous and being a spendthrift is a delicate balance. [insert sarcasm]
No, but seriously. I do like nice things. I like nice clothes. I like good food. I like having my house look good. But y'all know that I hate wasting money, and I will avoid spending more than necessary at all costs. Where am I going with this?
Enter this beauty: the Manzanita Candelabra in Silver from West Elm, "just" $99. I saw it, fell in lust, and immediately wanted two of them for my dining room. But can I justify spending $198? Nope! So I resorted to the internet....
...where I found these: a less expensive look-alike (Silver Twigs Taper Candle Centerpiece) from World Market. While it is smaller and a little less fabulous, it is just $34.99. Couple that with a Cyber Monday deal and I was one happy girl!
Now, I strongly considered DIYing one...but The Hubs shot me down. Apparently twigs, spray paint, and fire are a "dangerous combination." (Sheesh - what does he know?) Regardless, I am thrilled with my purchase!
- Maggie White
Showing posts with label home. Show all posts
Thursday, December 19, 2013
Tuesday, December 17, 2013
[ home ] :: dinner party!
So we had our first big shindig of the season this Saturday. Our neighborhood had a progressive dinner party and we co-hosted the main course. Note to self: make sure you can bleach your tablecloths before you serve pasta and red wine. We had a few big spills, and luckily everything washed clean.
Ignore my Post-Its all over everything...it's a pre-party ritual that I have so I know exactly what needs to be done (and what goes in each serving piece) right before guests arrive. Here is a view of the main table:
The breakfast room table:
The folding table in the living room:
Of course, all of the lights were on, candles were lit, and (cheap) flowers were everywhere. Check out my post on how to "stage" your house for visitors.
- Maggie White
Ignore my Post-Its all over everything...it's a pre-party ritual that I have so I know exactly what needs to be done (and what goes in each serving piece) right before guests arrive. Here is a view of the main table:
The breakfast room table:
The folding table in the living room:
Of course, all of the lights were on, candles were lit, and (cheap) flowers were everywhere. Check out my post on how to "stage" your house for visitors.
- Maggie White
Wednesday, December 11, 2013
[ home ] :: how to decorate a christmas tree
Decorating a Christmas tree - seems easy, right?
But how do you get a magazine-worthy tree?
One of my favorite memories growing up was setting up the tree and decorating it with my mom. First, my parents would buy the tree, bring it home, and then curse loudly as they struggled to get it through the front door. Then, they would set it up perfectly (mom would vacuum up all of the pine needles) and then we could finally begin decorating. I always loved how there were so many ornaments on the tree, you couldn't see the tree underneath!
My mom had a system of decorating that made the tree look fantastic, even if it wasn't perfect. Nowadays, The Hubs and I use an artificial tree but we still use the same method.
1) String the lights. Seems self-explanatory, right? If your tree isn't pre-lit (or is real), then put your lights on before you begin. Separate your strands by 8"-12". The same goes for any garland or tinsel you may have.
2) Hang your shiny, ball-shaped ornaments. These should always go on first, towards the trunk - not on the tips of the branches. Why? They reflect the lights! This creates an optical illusion that tricks the eye into thinking the tree has more lights and ornaments on it.
3) Hang your large or heavy ornaments. Even artificial trees can have "gaps" where they are missing foliage. Use those large ornaments to fill in those holes, making sure not to hang anything too big on top. However, take care not to hang fragile ornaments where pets or children can damage them.
4) Hang your medium-sized ornaments. This is the majority of mine - I start with my most-loved and sentimental ornaments at eye level where I will see them and enjoy them the most (and out of reach from the Demon Dogs).
5) Hang your small ornaments. These can be used to fill in any small "gaps" and can be hung on the ends of the branches.
Decorate heavily, or more sparse if you like. I prefer the look of a tree that is about to topple over with ornaments - there are so many memories there and I love searching out each individual ornament. Of course, you can use a mix of ornaments, or use just one color scheme (is the Lilly Pulitzer lion ornament that noticeable?).
Enjoy your holidays! Only 2 weeks until Christmas!
- Maggie White
But how do you get a magazine-worthy tree?
One of my favorite memories growing up was setting up the tree and decorating it with my mom. First, my parents would buy the tree, bring it home, and then curse loudly as they struggled to get it through the front door. Then, they would set it up perfectly (mom would vacuum up all of the pine needles) and then we could finally begin decorating. I always loved how there were so many ornaments on the tree, you couldn't see the tree underneath!
My mom had a system of decorating that made the tree look fantastic, even if it wasn't perfect. Nowadays, The Hubs and I use an artificial tree but we still use the same method.
1) String the lights. Seems self-explanatory, right? If your tree isn't pre-lit (or is real), then put your lights on before you begin. Separate your strands by 8"-12". The same goes for any garland or tinsel you may have.
2) Hang your shiny, ball-shaped ornaments. These should always go on first, towards the trunk - not on the tips of the branches. Why? They reflect the lights! This creates an optical illusion that tricks the eye into thinking the tree has more lights and ornaments on it.
| They are like tiny mirrors! |
3) Hang your large or heavy ornaments. Even artificial trees can have "gaps" where they are missing foliage. Use those large ornaments to fill in those holes, making sure not to hang anything too big on top. However, take care not to hang fragile ornaments where pets or children can damage them.
| This angel fills in a "bald" spot. |
5) Hang your small ornaments. These can be used to fill in any small "gaps" and can be hung on the ends of the branches.
Decorate heavily, or more sparse if you like. I prefer the look of a tree that is about to topple over with ornaments - there are so many memories there and I love searching out each individual ornament. Of course, you can use a mix of ornaments, or use just one color scheme (is the Lilly Pulitzer lion ornament that noticeable?).
Enjoy your holidays! Only 2 weeks until Christmas!
- Maggie White
Tuesday, December 10, 2013
[ home ] :: trash picture update
Remember this picture I got out of my neighbor's trash?
Well, I bought a frame and mat off of Amazon, hung it on the wall, and it looks fabulous. It's a great conversation starter, although The Hubs is still questioning my sanity a little bit.
For one, he is nervous about our neighborhood progressive dinner this coming weekend. Here is how the dinner plays out in his mind...
I think our neighbors will be like, "Oh damn, I wish I got a fabulous free garbage picture!" and envy us. Or not.
What do you think? Fabulous, or freaking gross?
- Maggie White
Well, I bought a frame and mat off of Amazon, hung it on the wall, and it looks fabulous. It's a great conversation starter, although The Hubs is still questioning my sanity a little bit.
For one, he is nervous about our neighborhood progressive dinner this coming weekend. Here is how the dinner plays out in his mind...
The Neighbor: Hey! That looks familiar. I used to have that exact same picture at my house, but I threw it away.
[The Hubs shrinks away in embarrassment.]
Mags: Yeah, I took it out of your garbage!
[The Hubs is mortified, and The Neighbor looks at me like I have scabies.]
I think our neighbors will be like, "Oh damn, I wish I got a fabulous free garbage picture!" and envy us. Or not.
What do you think? Fabulous, or freaking gross?
- Maggie White
Tuesday, November 26, 2013
[ home ] :: staging your home for the holidays
Whenever we have guests to our house, I have a little routine that I like to do in order to get my house super-spiffy looking. It helps to have your house clean before people arrive, especially the rooms that people will see. I thought I would share this list of little things you can do to make your house more inviting (and look better) in just a few minutes!
1) Aside from general cleanliness, your house should smell good. This does not mean coating everything in a shower of Febreze! Don't get me wrong - I love that stuff, but sometimes it will mask a bad odor and will fade over time. Before guests arrive, shove a dryer sheet into your throw pillows, under the sofa, and in-between cushions to keep your upholstery and linens smelling fresh.
Another great idea is to turn on the oven to its lowest setting and place a pan filled with water and lemon oil (or sliced lemons) inside. It acts like a giant diffuser and will leave your kitchen smelling fresh.
2) Set the ambiance! I furiously run through my house lighting candles and flipping on LED tea lights to make everything feel warmer (and smell better).
Adjust the lighting depending on your guest activities. Want your house to feel clean and fresh? Turn on every darn light in the house to make it feel crisp and spacious. Want the mood to be more subdued and cozy? Prepare your fireplace and dim the lights.
3) Last minute cleaning - everyone does this (I hope). I can tell you from my personal experience, the #1 dirty thing I notice are reflective surfaces in someone's home. Grab some Windex and give everything that is smooth and shiny a good wipe down - this means mirrors, windows, decorative glass, and appliances. I always clean off the "nose art" that the Demon Dogs make on the windows.
4) Add something organic on display, like fresh flowers, a house plant, or fruit. I have been known to run outside and pick a "bouquet" of rainbow Swiss Chard or shrub trimmings as decoration. In the summer, I almost always have a bunch of cut herbs in my kitchen as decoration. There is something about a living object that makes a space feel classy and multi-dimensional. If you don't have flowers handy, clip a few branches from a tree with pretty leaves to make some "modern art."
Happy Thanksgiving!
- Maggie White
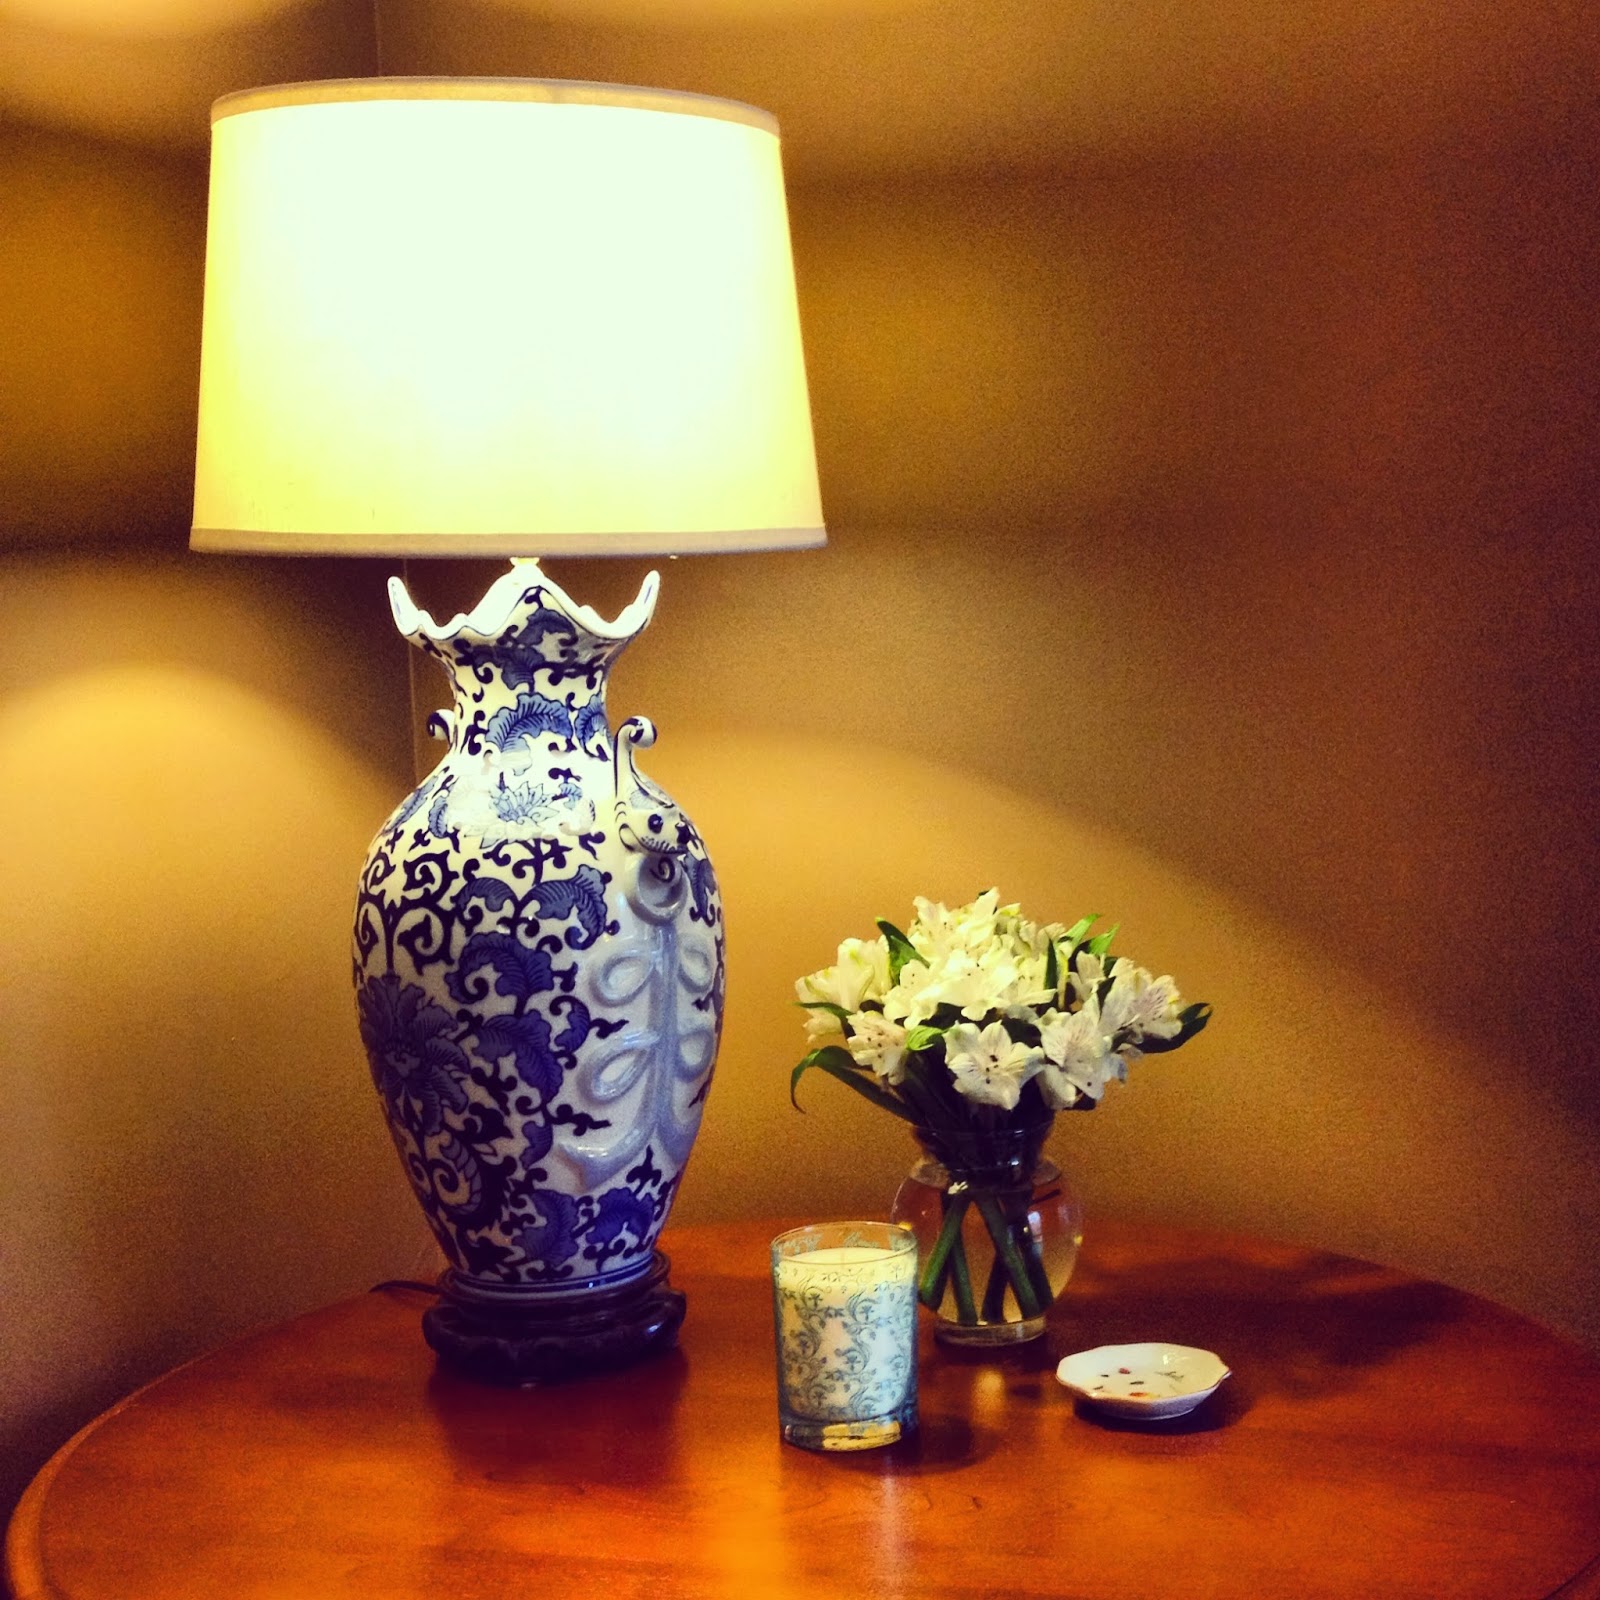
| Sitting room side table. |
1) Aside from general cleanliness, your house should smell good. This does not mean coating everything in a shower of Febreze! Don't get me wrong - I love that stuff, but sometimes it will mask a bad odor and will fade over time. Before guests arrive, shove a dryer sheet into your throw pillows, under the sofa, and in-between cushions to keep your upholstery and linens smelling fresh.
Another great idea is to turn on the oven to its lowest setting and place a pan filled with water and lemon oil (or sliced lemons) inside. It acts like a giant diffuser and will leave your kitchen smelling fresh.
2) Set the ambiance! I furiously run through my house lighting candles and flipping on LED tea lights to make everything feel warmer (and smell better).
Adjust the lighting depending on your guest activities. Want your house to feel clean and fresh? Turn on every darn light in the house to make it feel crisp and spacious. Want the mood to be more subdued and cozy? Prepare your fireplace and dim the lights.
| Bedroom - I swear that our lamp isn't that bright. |
3) Last minute cleaning - everyone does this (I hope). I can tell you from my personal experience, the #1 dirty thing I notice are reflective surfaces in someone's home. Grab some Windex and give everything that is smooth and shiny a good wipe down - this means mirrors, windows, decorative glass, and appliances. I always clean off the "nose art" that the Demon Dogs make on the windows.
| Guest room after a good cleaning. |
4) Add something organic on display, like fresh flowers, a house plant, or fruit. I have been known to run outside and pick a "bouquet" of rainbow Swiss Chard or shrub trimmings as decoration. In the summer, I almost always have a bunch of cut herbs in my kitchen as decoration. There is something about a living object that makes a space feel classy and multi-dimensional. If you don't have flowers handy, clip a few branches from a tree with pretty leaves to make some "modern art."
| Breakfast room table with lots of snacks and wax pumpkins. |
Happy Thanksgiving!
- Maggie White
Monday, November 25, 2013
[ home ] :: half bath before and after
We bought out house in February 2012 and immediately began renovations...and never quite finished some of them. On Friday, I posted an update on The Hubs' work on our staircase. But what I was I doing at the time?
(re-) Painting the half bath vanity and doing some final touch ups, that's what!
Before: The downstairs bath had new(ish) tile and a new toilet, but an old outdated oak builder's vanity and a stained composite marble top. It was also very, very red with had a textured ceiling. I wasn't a fan, but it had a good layout.
After: The Hubs and I began by removing the texture from the ceiling (it required a lot of scraping and a lot of sanding) and painting the walls "Realist Beige" by Sherwin Williams. It's a nice neutral color and I wasn't sure what colors I wanted in my decor yet. The wood on the vanity was splitting in some places, so I filled the damaged areas with wood filler, sanded it smooth, and painted it "Gotham Gray" by Valspar (Lowe's). Why Gotham Gray? Batman. (and it was a free paint sample)
Here's a close-up of it that shows the true color:
Oh...and I ripped the ugly builder's mirror off the wall and replaced it with one from Pottery Barn - it was the most expensive part of this re-do! The Hubs came home one day and I had written "This looks like sh*t!" on it with a Sharpie and was literally ripping the drywall out with it. I did the same thing to the vanity top, too. Whoops... We also got a new faucet, new bathroom hardware, new doorknobs, and a new indoor/outdoor rug from Pottery Barn to tie it all together. New everything.
I used Instagram on a few pictures because my iPhone hates the contrast between the vanity and wall.
The shelves need more styling, but I made and installed them last week. It was super easy, so I'll be posting a "how-to" guide soon. My total project came in under $20! I want to make sure I have knick-knacks up on them that we love looking at and remind us of people we love - after all, we're in there every day! Besides our engagement photos, we have a picture of Emma (dog) from our wedding, a few books (one my mom loves and one my dad recommended), a whelk shell from my grandmother, and the candle holders were a birthday gift from my mom when I moved into my first apartment. And I freaking love that butterfly plate - I got it for $5 from C.Wonder.
On the opposite wall I have some pictures of birds. I freaking love birds.
That's it for now! I told The Hubs this morning that this is the first room in the house that we have "finished" and he just rolled his eyes at me. Yeah...I'll probably change something in it soon.
- Maggie White
(re-) Painting the half bath vanity and doing some final touch ups, that's what!
Before: The downstairs bath had new(ish) tile and a new toilet, but an old outdated oak builder's vanity and a stained composite marble top. It was also very, very red with had a textured ceiling. I wasn't a fan, but it had a good layout.
After: The Hubs and I began by removing the texture from the ceiling (it required a lot of scraping and a lot of sanding) and painting the walls "Realist Beige" by Sherwin Williams. It's a nice neutral color and I wasn't sure what colors I wanted in my decor yet. The wood on the vanity was splitting in some places, so I filled the damaged areas with wood filler, sanded it smooth, and painted it "Gotham Gray" by Valspar (Lowe's). Why Gotham Gray? Batman. (and it was a free paint sample)
Here's a close-up of it that shows the true color:
Oh...and I ripped the ugly builder's mirror off the wall and replaced it with one from Pottery Barn - it was the most expensive part of this re-do! The Hubs came home one day and I had written "This looks like sh*t!" on it with a Sharpie and was literally ripping the drywall out with it. I did the same thing to the vanity top, too. Whoops... We also got a new faucet, new bathroom hardware, new doorknobs, and a new indoor/outdoor rug from Pottery Barn to tie it all together. New everything.
I used Instagram on a few pictures because my iPhone hates the contrast between the vanity and wall.
| The Hubs left the potty seat up. |
| Hand towel: West Elm ($10) Vase: Goodwill ($1.91) Indian bronze dish: Hand-me-down |
| Misc knick-knacks! Ikat bowl: West Elm ($6) Candle holders (similar): CB2 |
On the opposite wall I have some pictures of birds. I freaking love birds.
| Bird pictures: Pottery Barn (free-ish). They double-shipped my order. |
That's it for now! I told The Hubs this morning that this is the first room in the house that we have "finished" and he just rolled his eyes at me. Yeah...I'll probably change something in it soon.
- Maggie White
Friday, November 22, 2013
[ home ] :: friday fun!
At 6:00 this morning, I woke up to some odd scratching noise. I had never heard anything like it before that early in the morning, so I was a little freaked out. When I rolled over to nudge The Hubs so he could valiantly investigate the source...he was gone!
...he was sanding our stairs.
My brother-in-law and his girlfriend are coming to visit over the Thanksgiving holiday, and The Hubs is going bonkers about our random house projects that we never quite finished. Take, for example: our staircase.
Before: cheap carpet, laminate floor, dingy and splitting wood, and no light. There was also a header above the fourth or fifth step that was so low, The Hubs and I would hit our heads on it. It didn't bother him, but it did bother his dad and myself. The Hubs went out of town one week, and the second he left, his dad and I tore the whole thing apart and made it more forehead-friendly!
We never installed hardwood over the steps since we had not renovated our master bathroom (and still haven't!), so I ripped up the old, nasty carpet and stained the stairs a dark color (Kona by Rustoleum). When we moved in, the handrail was removed so we could get our furniture upstairs and it never made its way back onto the wall. Whoops! The Hubs painted it black this week and reinstalled it for me. I'm too clumsy to do it myself.
Here is a sneak peek at what the steps will look like when they are done - aren't they gorgeous?! The Hubs fit the nosepiece on the top step last night and nailed it into place. We have "Lono" oak that we bought from Lumber Liquidators and love it. It was a steal for under $2.50 per square foot (I want to say it was $2.29/sqft) and we installed it ourselves. If you're looking for new flooring, this stuff comes very highly recommended!
Even though I don't have much room for a grand foyer, I still dream big! Here is my inspiration:
I'll have to keep you guys updated on the changes that are going on here. We want to have our new hardwood steps and a new banister installed before a party we're co-hosting in mid-December. I have dreams of installing decorative molding and a pretty pendent light...we'll see if that happens or not. Hopefully I will have some gorgeous pictures to show of our stairs in a few weeks!
- Maggie White
...he was sanding our stairs.
My brother-in-law and his girlfriend are coming to visit over the Thanksgiving holiday, and The Hubs is going bonkers about our random house projects that we never quite finished. Take, for example: our staircase.
Before: cheap carpet, laminate floor, dingy and splitting wood, and no light. There was also a header above the fourth or fifth step that was so low, The Hubs and I would hit our heads on it. It didn't bother him, but it did bother his dad and myself. The Hubs went out of town one week, and the second he left, his dad and I tore the whole thing apart and made it more forehead-friendly!
We never installed hardwood over the steps since we had not renovated our master bathroom (and still haven't!), so I ripped up the old, nasty carpet and stained the stairs a dark color (Kona by Rustoleum). When we moved in, the handrail was removed so we could get our furniture upstairs and it never made its way back onto the wall. Whoops! The Hubs painted it black this week and reinstalled it for me. I'm too clumsy to do it myself.
| You can see where The Hubs has been sanding... |
| The Hubs hard at work - touch up painting! |
Even though I don't have much room for a grand foyer, I still dream big! Here is my inspiration:
| Source |
| Source |
- Maggie White
Friday, November 8, 2013
[ home ] :: diy recycled glass candle holder
Hey guys - I'm doing another Pinterest project!
There are two things I love: saving money and making things. This project was perfect because it combines both and is super fast and easy to complete.
What to do with the glass that it came in? I thought I would make a votive holder!
I've had my eye on these glasses from C. Wonder for a hot minute but I'm too poor to dish out $48 for a set of 4 glasses. How cool would something like this be for a candle, though?
So, I pulled up a Pinterest post on "Jars for Things" from the blog Yellow Brick Home (my newest obsession, by the way), and followed her instructions for removing the leftover wax. First, I boiled water in my tea kettle and poured it into the candle holder. Then (important!) I let it cool and harden. Most of the wax came out then, but I used my handy-dandy toothbrush and some dish soap to scrub out the rest of the debris.
Next up, I laid out my design for my candle holder. The first thing I did was tape around the edges of the glass with blue painter's tape, then filled the inside with newspaper and taped it securely. This way, the paint won't get on the inside or bottom of the glass (unless you want it to!). I wanted to make stripes like on the glass above, but I got too lazy. I figure that I'll make another candle holder soon anyway.
Finally, I took my holder outside and gave it three very light spritzes with gold spray paint. If you go too thick with the paint, it may cause it to pull off with the tape. Patience!
Voila! My votive holder. I placed three LED votives inside (fire and I don't always mix).
- Maggie White
There are two things I love: saving money and making things. This project was perfect because it combines both and is super fast and easy to complete.
What to do with the glass that it came in? I thought I would make a votive holder!
I've had my eye on these glasses from C. Wonder for a hot minute but I'm too poor to dish out $48 for a set of 4 glasses. How cool would something like this be for a candle, though?
![]() |
| Golden Stripe Glassware, $48 |
So, I pulled up a Pinterest post on "Jars for Things" from the blog Yellow Brick Home (my newest obsession, by the way), and followed her instructions for removing the leftover wax. First, I boiled water in my tea kettle and poured it into the candle holder. Then (important!) I let it cool and harden. Most of the wax came out then, but I used my handy-dandy toothbrush and some dish soap to scrub out the rest of the debris.
Next up, I laid out my design for my candle holder. The first thing I did was tape around the edges of the glass with blue painter's tape, then filled the inside with newspaper and taped it securely. This way, the paint won't get on the inside or bottom of the glass (unless you want it to!). I wanted to make stripes like on the glass above, but I got too lazy. I figure that I'll make another candle holder soon anyway.
Finally, I took my holder outside and gave it three very light spritzes with gold spray paint. If you go too thick with the paint, it may cause it to pull off with the tape. Patience!
Voila! My votive holder. I placed three LED votives inside (fire and I don't always mix).
- Maggie White
Tuesday, November 5, 2013
[ home ] :: cleaning return covers
Do your vent return covers get yucky? Mine do! I had an acquaintance throw away their return covers and buy all new ones when they got to looking like this:
But me? No way. I did replace all of the covers when we bought our house (they were old and some were rusty) except for the one pictured above. It's a weird size and would have to have been special ordered...um, no thanks. It has probably been over a year since I gave it a thorough scrubbing, although I do vacuum it off every few weeks. This one particular cover was straight-up nasty, so I took it off, carried it outside and gave it a good scrub with some hot water mixed with vinegar (5 gallons of hot water with 1/2 cup white vinegar).
It still wasn't the pristine-white color I wanted, so I decided a fresh coat of paint wouldn't hurt! I used Rustoleum Ultra Cover in white semi-gloss.
Is it me, or when you spray paint outside every bug in the yard gets stuck in the wet paint?
Aside from a few little bugs walking through my paint, and a few drippy spots, it turned out great! I gave it a light sanding over the bad areas and re-spritzed before I took it inside to be reinstalled.
- Maggie White
| Yucky, yucky, yuck. |
But me? No way. I did replace all of the covers when we bought our house (they were old and some were rusty) except for the one pictured above. It's a weird size and would have to have been special ordered...um, no thanks. It has probably been over a year since I gave it a thorough scrubbing, although I do vacuum it off every few weeks. This one particular cover was straight-up nasty, so I took it off, carried it outside and gave it a good scrub with some hot water mixed with vinegar (5 gallons of hot water with 1/2 cup white vinegar).
It still wasn't the pristine-white color I wanted, so I decided a fresh coat of paint wouldn't hurt! I used Rustoleum Ultra Cover in white semi-gloss.
Is it me, or when you spray paint outside every bug in the yard gets stuck in the wet paint?
| Way better, right? |
Aside from a few little bugs walking through my paint, and a few drippy spots, it turned out great! I gave it a light sanding over the bad areas and re-spritzed before I took it inside to be reinstalled.
- Maggie White
Thursday, October 31, 2013
[ home ] :: halloween update
Update: We had three kids come by the house!
And instead of dinner, The Hubs and I are having the Dinner of Champions:
...leftover candy.
- Maggie White
And instead of dinner, The Hubs and I are having the Dinner of Champions:
...leftover candy.
- Maggie White
[ home ] :: happy halloween!
Here's a tip (and a daily deal) for you guys - Halloween and fall-themed decorations are the cheapest around the end of October and Joann Fabric & Crafts now has all Halloween-themed items 70% off!
Last year was our first Halloween in our "real house" - we lived in a condo prior to moving and there were no kids in the area. When we didn't get any trick-or-treaters last year for Halloween, I was totally bummed out over it...and I ate all the leftover candy. However, in the past year we have had four families with children move into our neighborhood! I immediately began thinking about how I can lure children to my house so I can give them candy?
Decorations! I need decorations! So I scurried to Joann, bought some wall decals, and grabbed a "Halloween" banner for my front door. Ta-da!
Can you tell that I put minimal effort into my decorating this year? Hah!
The retail value for my decorations was $14.99 for the decals and $19.99 for the banner. I got them for 70% off, making them just $4.49 and $5.99 - what a score! I also got a candy bowl (originally $4.99) for $1.49, and bought my candy from Publix. They had a deal last week for Buy2 Get 1 Free on Hershey's and Reese's, plus I had a $1.50 off coupon. That made the price of my candy drop from $19.97 to $11.28. (Hint: if you want cheap candy, buy it at Kroger tomorrow when it's 50% off!)
Original Halloween Cost: $49.94
My Halloween Cost: $23.75
- Maggie White
Last year was our first Halloween in our "real house" - we lived in a condo prior to moving and there were no kids in the area. When we didn't get any trick-or-treaters last year for Halloween, I was totally bummed out over it...and I ate all the leftover candy. However, in the past year we have had four families with children move into our neighborhood! I immediately began thinking about how I can lure children to my house so I can give them candy?
Decorations! I need decorations! So I scurried to Joann, bought some wall decals, and grabbed a "Halloween" banner for my front door. Ta-da!
![]() |
| I feel like my door should be orange, not red! |
Can you tell that I put minimal effort into my decorating this year? Hah!
The retail value for my decorations was $14.99 for the decals and $19.99 for the banner. I got them for 70% off, making them just $4.49 and $5.99 - what a score! I also got a candy bowl (originally $4.99) for $1.49, and bought my candy from Publix. They had a deal last week for Buy2 Get 1 Free on Hershey's and Reese's, plus I had a $1.50 off coupon. That made the price of my candy drop from $19.97 to $11.28. (Hint: if you want cheap candy, buy it at Kroger tomorrow when it's 50% off!)
Original Halloween Cost: $49.94
My Halloween Cost: $23.75
- Maggie White
Wednesday, October 30, 2013
[ home ] :: tissue art
Sometimes it can be hard to get 60+
students to pay attention in class while you drone on and on about biology. Well, I don't actually "drone," but I do like to keep things interesting. One of my favorite things to show my students is pictures like these from Nikon's MicroscopyU:
What is it? Well, that's the intestinal tissue of a mouse. This picture usually elicits a chorus of, "oooooooh....pretty!" from my classroom.
This was my desktop background at work for a few years:
I'm in firm believer that some of the best art is found in nature, and these little beauties are no exception. While the cells are not naturally colored this way, they can be stained with fluorescent "dyes," to put it simply. How awesome would these look printed out and framed in my office?
- Maggie White
| Gorgeous! |
What is it? Well, that's the intestinal tissue of a mouse. This picture usually elicits a chorus of, "oooooooh....pretty!" from my classroom.
| One of my personal favorites...look at those microtubules! |
This was my desktop background at work for a few years:
| Cervical cancer (HeLa) cells. |
I'm in firm believer that some of the best art is found in nature, and these little beauties are no exception. While the cells are not naturally colored this way, they can be stained with fluorescent "dyes," to put it simply. How awesome would these look printed out and framed in my office?
| I love this one! |
- Maggie White
Tuesday, October 22, 2013
[ home ] :: cleaning out closets
I've been organizing like a madwoman this week, and one thing I noticed was that The Hubs has a lot of clothes. This isn't a bad thing, but I have no idea what he wears on a regular basis and what he doesn't wear. And trying to get him to go through everything with me? Impossible!
One thing I can't stand is wasting space on things we don't wear or use, so every so often I like to get a bag of items together for donation. Without help from The Hubs, I needed a way to tell what he's been using and what is sitting and taking up space.
So how do I tell what to donate and what to keep? I look at the hangers!
I flipped all of the hangers backwards, and anything that is worn and washed gets hung back up the right way. After 6 months, anything still hanging backwards has not been worn and will be sorted through and donated. Yay!
I read this tip on the internet somewhere (I can't remember where, probably on Pinterest), and loved it. One of The Hubs' coworkers thought this was the most genius idea ever and was planning on doing this to his wife's clothes...not a good idea. Not good at all.
Happy organizing!
- Maggie White
One thing I can't stand is wasting space on things we don't wear or use, so every so often I like to get a bag of items together for donation. Without help from The Hubs, I needed a way to tell what he's been using and what is sitting and taking up space.
So how do I tell what to donate and what to keep? I look at the hangers!
I flipped all of the hangers backwards, and anything that is worn and washed gets hung back up the right way. After 6 months, anything still hanging backwards has not been worn and will be sorted through and donated. Yay!
I read this tip on the internet somewhere (I can't remember where, probably on Pinterest), and loved it. One of The Hubs' coworkers thought this was the most genius idea ever and was planning on doing this to his wife's clothes...not a good idea. Not good at all.
Happy organizing!
- Maggie White
Subscribe to:
Posts (Atom)